Nissan Drive Recorder Manual⁚ A Comprehensive Guide
This comprehensive guide provides a detailed overview of the Nissan Drive Recorder, covering everything from its purpose and benefits to installation, usage, and troubleshooting. Whether you are a new owner of a Nissan vehicle equipped with a Drive Recorder or simply curious about this innovative technology, this manual will serve as your ultimate resource.
Introduction
In today’s world, safety and security are paramount, especially on the road. Nissan, a renowned automotive manufacturer, understands this concern and has introduced the Nissan Drive Recorder, a cutting-edge technology designed to enhance your driving experience and provide peace of mind. This comprehensive manual will serve as your guide to understanding the Nissan Drive Recorder, its features, and how to utilize its capabilities effectively. The Nissan Drive Recorder is a dual-camera system that captures both the road ahead and the interior of your vehicle, offering valuable insights into any incidents that may occur. This manual will delve into the key aspects of the Drive Recorder, from its installation process to accessing and downloading recorded footage, empowering you to make the most of this advanced safety feature.
What is a Nissan Drive Recorder?
The Nissan Drive Recorder is a sophisticated safety feature that acts as a “black box” for your vehicle. It is essentially a dual-camera system, with one camera facing forward to capture the road ahead and another camera pointed towards the interior of the cabin. This comprehensive recording capability provides a visual record of your driving experience, serving as valuable evidence in the event of an accident or any other incident. The Drive Recorder is often referred to as a “dashcam” or “rear view monitor,” and its primary function is to document events, ensuring that you have a clear picture of what transpired. It is a crucial tool for enhancing safety and accountability on the road, offering peace of mind for both drivers and passengers.
Benefits of Using a Nissan Drive Recorder
The Nissan Drive Recorder offers a range of benefits that contribute to enhanced safety, peace of mind, and potential cost savings. Here are some of the key advantages⁚
- Accident Evidence⁚ In the unfortunate event of an accident, the Drive Recorder provides irrefutable evidence of what happened, helping to clarify the circumstances and potentially resolving disputes.
- Enhanced Safety⁚ The presence of a Drive Recorder can deter reckless driving and encourage safer behavior on the road, knowing that actions are being recorded.
- Theft Prevention⁚ The interior camera can capture footage of any unauthorized entry into your vehicle, offering valuable evidence in case of theft or vandalism;
- Driver Behavior Analysis⁚ The recorded footage can be used to analyze driving habits and identify areas for improvement, contributing to safer driving practices.
- Potential Insurance Discounts⁚ Some insurance companies may offer discounts to drivers who have a Drive Recorder installed, recognizing its potential to reduce accidents and claims.
Overall, the Nissan Drive Recorder provides a valuable safety and security enhancement for your vehicle, offering a range of benefits that can make your driving experience safer and more secure.
Types of Nissan Drive Recorders
Nissan offers a variety of Drive Recorder models, each with its own unique features and capabilities. Two of the most common models are the Dual Camera Drive Recorder and the Single Camera Drive Recorder.
- Dual Camera Drive Recorder⁚ This model features two cameras⁚ one facing forward to capture the road ahead and another pointing towards the vehicle’s interior. This provides a comprehensive view of the driving environment and any potential incidents inside the cabin.
- Single Camera Drive Recorder⁚ This model features a single camera that typically focuses on the road ahead. It captures footage of the driving environment and can be a cost-effective option for those primarily interested in recording incidents related to road conditions and other vehicles.
The specific features and capabilities of each Drive Recorder model may vary depending on the vehicle year and trim level. It’s recommended to consult your vehicle’s owner’s manual or contact your Nissan dealer for detailed information about the Drive Recorder model installed in your vehicle.
Nissan Drive Recorder Installation
Installing a Nissan Drive Recorder is generally a straightforward process. However, the exact steps may vary depending on the specific model and vehicle year. You can find detailed instructions in the installation manual that comes with the Drive Recorder kit. Here’s a general overview of the installation process⁚
- Prepare the Installation Area⁚ Clean the area where you’ll be mounting the Drive Recorder, ensuring it’s free of dust, dirt, and debris. This will help ensure a secure and proper installation.
- Mount the Drive Recorder⁚ Position the Drive Recorder according to the installation template provided in the manual. Use the included adhesive or mounting brackets to securely attach the device to the desired location.
- Connect the Drive Recorder Harness⁚ Connect the Drive Recorder harness to the vehicle’s electrical system, following the instructions in the manual. This typically involves connecting the harness to a power source and a ground wire.
- Configure the Drive Recorder⁚ Once installed, configure the Drive Recorder settings, including recording resolution, video quality, and other preferences. Refer to the user manual for detailed instructions on customizing the settings.
If you are not comfortable with the installation process, it’s recommended to seek assistance from a qualified technician at an authorized Nissan dealership. They can ensure a proper and safe installation of your Drive Recorder.
Installing the Drive Recorder Harness
Connecting the Drive Recorder harness is a crucial step in the installation process. It involves connecting the Drive Recorder to the vehicle’s electrical system, ensuring a power supply and proper functionality. The harness typically includes multiple wires for power, ground, and video signals.
Here’s a general guide to installing the Drive Recorder harness⁚
- Locate the Harness Connection Points⁚ Refer to the installation manual for specific locations where the harness needs to be connected. These points might vary depending on your vehicle model and year.
- Connect the Power Wire⁚ The power wire should be connected to a suitable power source, such as the vehicle’s fuse box or a dedicated power outlet. Ensure the power source is compatible with the Drive Recorder’s voltage requirements.
- Connect the Ground Wire⁚ The ground wire needs to be connected to a solid metal point on the vehicle’s chassis. This provides a proper grounding path for the electrical circuit.
- Connect the Video Wires⁚ If applicable, connect the video wires from the Drive Recorder to the vehicle’s display or head unit. These wires transmit the recorded footage to the display.
- Secure the Harness⁚ Secure the harness using zip ties or other appropriate fasteners to prevent it from moving or becoming damaged.
Always refer to the specific instructions in your Drive Recorder’s installation manual for detailed guidance and precautions. If you’re unsure about any step, it’s best to consult with a qualified technician at an authorized Nissan dealership.
Connecting the Drive Recorder to Power
Powering the Nissan Drive Recorder is essential for its operation. The recorder typically draws power from the vehicle’s electrical system, ensuring it functions while the vehicle is in use. The power connection ensures the Drive Recorder can record video footage, capture audio, and store data.
Here’s a general guide to connecting the Drive Recorder to power⁚
- Locate the Power Source⁚ Refer to the installation manual for the recommended power source. It might be a dedicated power outlet, a fuse box connection, or a specific wiring harness.
- Connect the Power Wire⁚ Connect the Drive Recorder’s power wire to the designated power source, ensuring a secure connection. The power wire is usually color-coded to indicate its purpose.
- Check for Proper Connection⁚ After connecting the power wire, ensure it is securely connected to the power source. A loose connection can lead to intermittent power supply, affecting the Drive Recorder’s functionality.
- Verify Power Supply⁚ Turn on the vehicle’s ignition and check if the Drive Recorder is receiving power. It should display a power indicator or an initial startup screen.
- Confirm Correct Voltage⁚ Ensure the power source provides the correct voltage required by the Drive Recorder. Refer to the manual for specific voltage requirements.
Always follow the specific instructions provided in your Drive Recorder’s installation manual. If you have any doubts, consult a qualified technician at an authorized Nissan dealership.
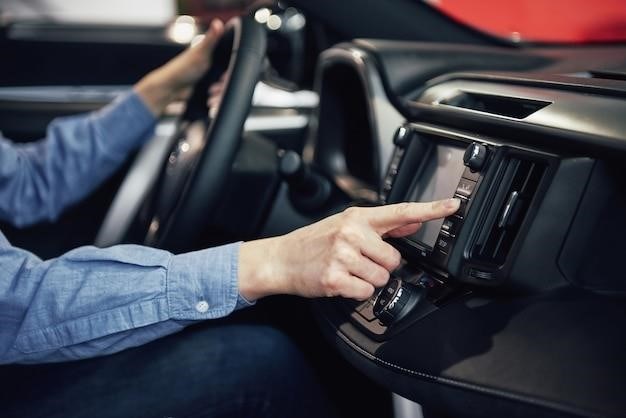
Using the Drive Recorder
Once you have successfully installed and powered up your Nissan Drive Recorder, you’re ready to utilize its capabilities. The Drive Recorder typically offers various recording modes, settings, and features to capture footage and manage data effectively.
Here’s a breakdown of general usage⁚
- Recording Modes⁚ The Drive Recorder may offer different recording modes, such as continuous recording, event-based recording, and manual recording. Continuous recording captures footage constantly, while event-based recording triggers recording upon detecting motion or impact. Manual recording allows you to initiate recording manually.
- Settings Configuration⁚ Access the Drive Recorder’s settings menu to customize recording resolution, frame rate, video quality, and other parameters. Adjust the settings to meet your specific needs and preferences.
- Viewing Recorded Footage⁚ The Drive Recorder usually provides a built-in playback feature to review recorded footage directly on the device. Access the playback menu and navigate through the recordings to view them.
- Additional Features⁚ Some Drive Recorders may offer additional features such as GPS tracking, time-lapse recording, and parking mode. These features provide extra functionality and enhance the recording experience.
- Troubleshooting⁚ If you encounter any issues during the recording process, consult the Drive Recorder’s user manual for troubleshooting tips. It might include solutions for common problems such as storage space limitations, recording errors, or connectivity issues.
Remember that the specific features and operation of your Nissan Drive Recorder might vary slightly depending on the model and year of your vehicle. Refer to the Drive Recorder’s user manual for detailed instructions and information specific to your model.
Accessing Recorded Footage
After capturing footage with your Nissan Drive Recorder, you’ll need to access it for review or to download for storage purposes. The Drive Recorder typically provides various methods to access your recordings, depending on the model and its capabilities.
Here’s a general overview of how to access recorded footage⁚
- On-Device Playback⁚ Most Drive Recorders have a built-in playback feature that allows you to view recordings directly on the device’s screen. Navigate to the playback menu, select the desired recording, and review the footage. This provides a quick and convenient way to check the content.
- SD Card Access⁚ If the Drive Recorder utilizes an SD card for storage, you can access the recordings by removing the card from the device and connecting it to a computer or other compatible device. This allows you to view and manage recordings directly on your computer or mobile device.
- Dedicated App⁚ Some Drive Recorders might have a dedicated mobile app that connects to the device via Bluetooth or Wi-Fi. This app provides a user-friendly interface to view recordings, manage settings, and download footage to your phone or tablet.
- Cloud Storage⁚ Certain Drive Recorders offer cloud storage options, allowing you to upload your recordings to a secure online platform. This provides convenient access to your footage from any internet-connected device, even if the SD card is full or unavailable.
The specific methods and features available to access recorded footage may vary based on the Drive Recorder model. Consult the Drive Recorder’s user manual for detailed instructions on accessing and managing your recordings for your specific model.
Downloading Footage to Your Device
Downloading recorded footage from your Nissan Drive Recorder to your personal device is crucial for long-term storage, sharing, or further analysis. The downloading process varies depending on the specific Drive Recorder model and its features. Here’s a general guide on how to download footage⁚
- SD Card Transfer⁚ If the Drive Recorder utilizes an SD card for storage, remove the card from the device and connect it to your computer or mobile device. Depending on your device and operating system, you may need a card reader to access the SD card. Once connected, locate the recorded video files (usually in an “MP4” format) and copy them to your device.
- Dedicated App⁚ Some Drive Recorders have a dedicated mobile app that allows you to download recordings wirelessly. Connect your smartphone or tablet to the Drive Recorder via Bluetooth or Wi-Fi, open the app, and select the desired recordings. The app will guide you through the download process, transferring the videos to your device’s storage.
- Cloud Storage Download⁚ If the Drive Recorder offers cloud storage, you can access your recordings through a web portal or dedicated mobile app. Log in to your account, navigate to the recorded videos, and select the footage you want to download. The cloud service will allow you to save the files to your computer or mobile device.
For specific instructions on how to download footage from your Drive Recorder model, refer to the user manual or consult the online resources provided by Nissan. Understanding the correct download method for your device ensures that you can easily preserve and access valuable recordings from your Drive Recorder.
Troubleshooting Common Issues
While Nissan Drive Recorders are designed to be reliable, you may encounter occasional issues. Identifying and resolving these problems is essential for maintaining optimal performance. Here are some common issues and their potential solutions⁚
- No Recording⁚ If the Drive Recorder is not recording, ensure that the power source is connected correctly. Check the SD card for sufficient space and verify if the recording mode is activated.
- Poor Video Quality⁚ Poor video quality may indicate a problem with the camera lens, SD card, or settings. Clean the camera lens to remove any debris. Try formatting the SD card or changing the video resolution settings.
- Intermittent Recording⁚ If the Drive Recorder intermittently stops recording, check the power source and ensure that the device is not experiencing any software glitches. Updating the firmware to the latest version can often resolve these issues.
- Incorrect Date and Time⁚ If the recordings display an incorrect date and time, adjust the Drive Recorder’s clock settings; Refer to the user manual for instructions on how to set the correct time.
- SD Card Errors⁚ Error messages related to the SD card may indicate that the card is corrupted or incompatible. Try replacing the SD card with a new one that meets the Drive Recorder’s specifications.
If you are unable to resolve the issue yourself, contact Nissan customer support or a qualified technician for assistance. These troubleshooting steps should help you identify and address common problems with your Nissan Drive Recorder.
Frequently Asked Questions
Here are some of the most frequently asked questions about the Nissan Drive Recorder⁚
- What is the storage capacity of the Drive Recorder? The storage capacity depends on the SD card used. Refer to the user manual for the recommended SD card size and specifications.
- How long does the Drive Recorder record? The recording duration varies depending on the SD card size and the recording settings. The Drive Recorder typically records in 1-minute increments.
- Does the Drive Recorder have a built-in GPS? Some Drive Recorder models include a built-in GPS. Refer to the user manual for specific features and capabilities.
- Can I view the recorded footage on my smartphone? Yes, you can typically view the recorded footage on your smartphone by connecting the Drive Recorder to your device using a dedicated app. Refer to the user manual for specific app instructions.
- Is the Drive Recorder compatible with all Nissan vehicles? The Drive Recorder is compatible with specific Nissan models. Check the user manual or contact Nissan customer support for compatibility information.
- Can I install the Drive Recorder myself? While installation is generally straightforward, it is recommended to refer to the user manual for detailed instructions and consult a qualified technician if you are unsure.
If you have any further questions, please refer to the user manual or contact Nissan customer support for assistance.