Perdue Whole Roaster Cooking Instructions: A Comprehensive Guide
This guide provides detailed instructions for preparing and cooking a Perdue Whole Roaster, ensuring a delicious and safely cooked meal for your family and friends.
Understanding the Perdue Whole Roaster
The Perdue Whole Roaster is a pre-seasoned, whole chicken designed for convenient and flavorful roasting. Typically weighing between 5-7 pounds, these roasters often include a seasoning packet for enhanced taste, though some varieties are unseasoned, allowing for custom flavor profiles.
Understanding the bird’s structure is key; it includes both light and dark meat, requiring different cooking times for optimal tenderness. The skin-on preparation contributes to a crispy exterior and helps retain moisture during the roasting process. Perdue Whole Roasters are readily available in most grocery stores, offering a cost-effective and versatile meal option. Knowing these basics sets the stage for successful cooking!
Preparing the Roaster for Cooking
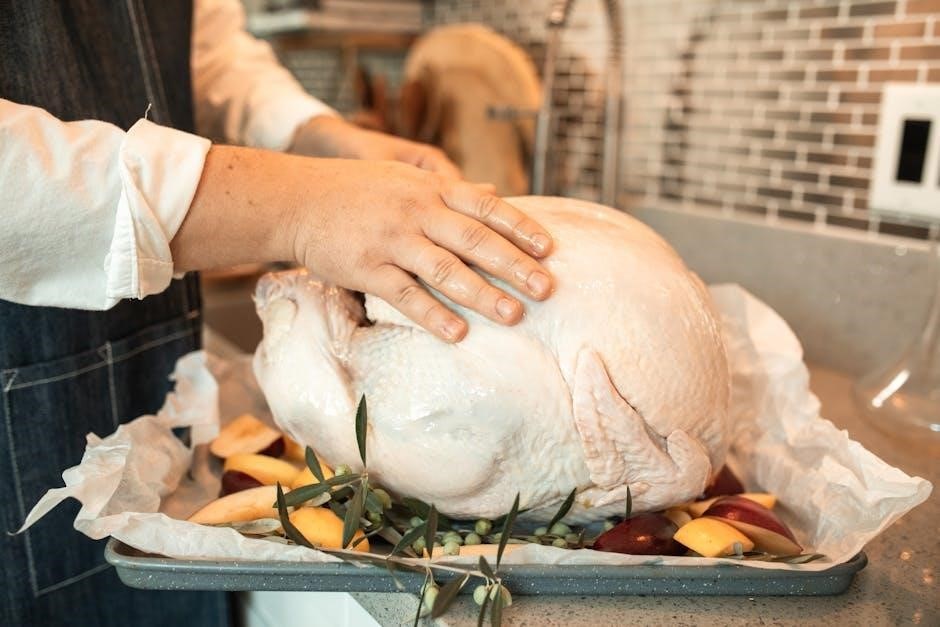
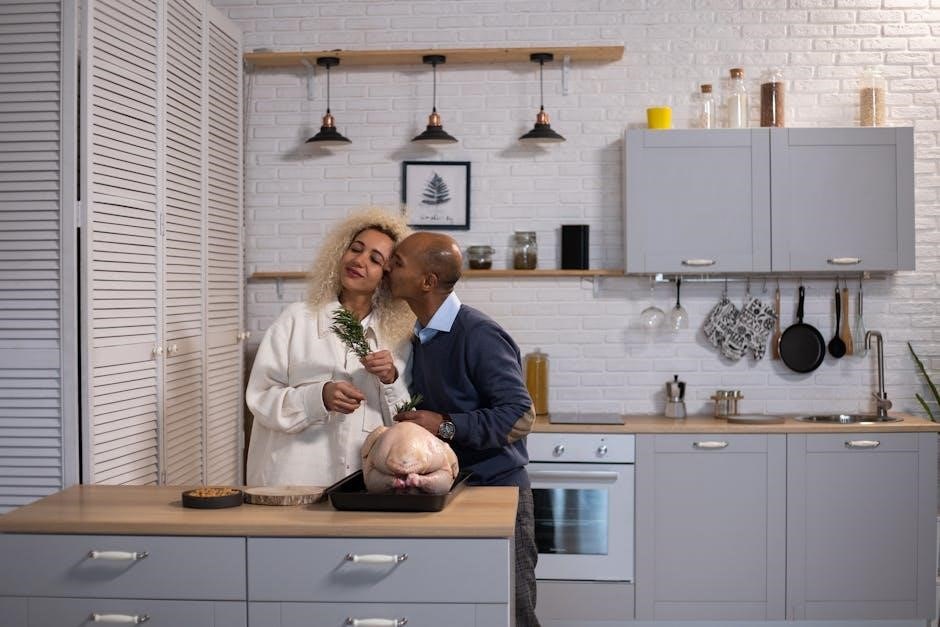
Begin by removing the Perdue Whole Roaster from its packaging and patting it dry with paper towels – this promotes crispy skin. Check the cavity for the giblets and neck; remove and reserve for gravy if desired. Gently loosen the skin over the breast and thighs, creating space for seasonings or butter.
If the roaster includes a seasoning packet, apply it evenly under and over the skin. For custom seasoning, consider herbs like rosemary, thyme, and garlic powder. Lightly oil the skin with olive oil or cooking spray. Preparing the roaster properly ensures even cooking and maximum flavor infusion throughout the entire bird.
Thawing the Perdue Whole Roaster
Safe thawing is crucial for a delicious and healthy meal. The recommended method is refrigerator thawing, allowing ample time for even temperature increase. A large roaster can take 24 hours for every 5 pounds of weight. Ensure the roaster remains in its original packaging and is placed on a tray to catch any drips.
For faster thawing, use the cold water method. Submerge the sealed roaster in cold water, changing the water every 30 minutes. Calculate approximately 30 minutes per pound. Never thaw at room temperature, as this encourages bacterial growth. Once thawed, cook immediately for optimal safety and quality.
Brining or Marinating (Optional)
While not essential, brining or marinating significantly enhances the roaster’s flavor and moisture. A basic brine consists of water, salt, and sugar, often with added aromatics like herbs, peppercorns, and citrus. Submerge the thawed roaster in the brine for 12-24 hours in the refrigerator.

Marinating offers a quicker flavor infusion. Combine oil, acid (like vinegar or lemon juice), and seasonings. Marinate for at least 4 hours, but no longer than 24, in the refrigerator. Pat the roaster dry before cooking to ensure crispy skin. Remember to discard the brine or marinade after use; do not reuse.
Roasting Methods
Several techniques exist for roasting a Perdue Whole Roaster, each offering unique benefits regarding cooking time, flavor, and ease of carving for optimal results.
Oven Roasting: Traditional Method
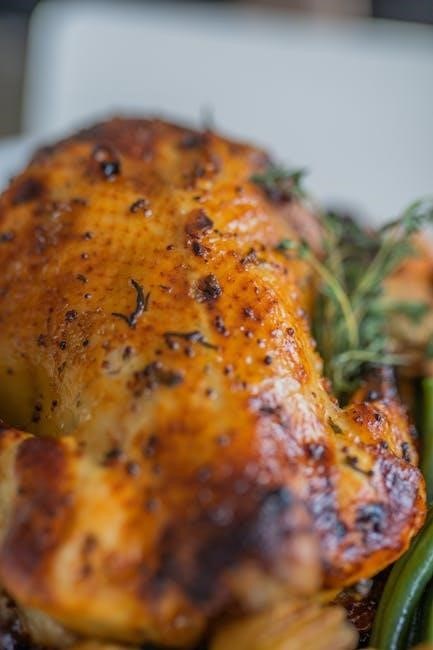
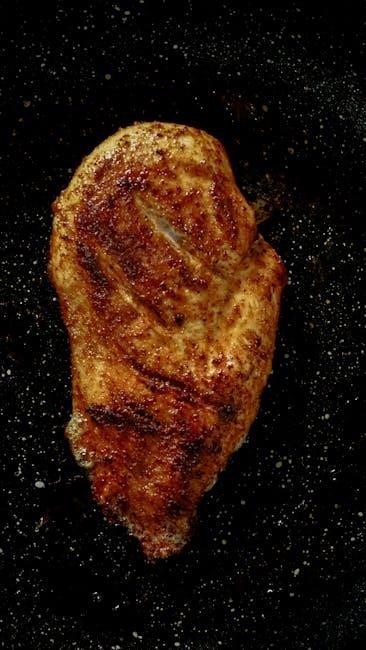
Oven roasting remains the most popular and straightforward method for cooking a Perdue Whole Roaster, delivering consistently juicy and flavorful results. This technique involves placing the roaster directly in the oven, allowing the heat to circulate and cook the bird evenly. Preheating the oven is crucial, typically to 325°F (163°C) to 350°F (177°C), depending on the desired cooking speed and skin crispness.
Ensure the roaster is properly seasoned, either with a simple salt and pepper rub or a more elaborate blend of herbs and spices. Basting the roaster periodically with its own juices, melted butter, or a flavorful marinade helps maintain moisture and enhances the skin’s color and texture. Consistent monitoring is key to achieving perfectly cooked poultry.
Temperature and Time Guidelines
For a Perdue Whole Roaster, a general guideline is to roast at 325°F (163°C) for approximately 3-4 hours, but this varies based on the roaster’s weight. A 12-14 pound roaster typically requires 3.5 to 4 hours. Always prioritize internal temperature over cooking time. Begin checking the internal temperature with a meat thermometer after 3 hours.
Increasing the oven temperature to 350°F (177°C) can reduce cooking time, but may result in drier meat and less evenly browned skin. Conversely, a lower temperature of 300°F (149°C) promotes more tender, moist results, but extends the cooking duration. Adjust cooking time accordingly, ensuring the final internal temperature reaches a safe level.
Using a Roasting Rack
Employing a roasting rack when cooking your Perdue Whole Roaster is highly recommended; A rack elevates the bird above the pan drippings, promoting even heat circulation around the entire roaster. This results in crispier skin and more uniform cooking, preventing the underside from becoming soggy.
The rack also facilitates easier carving after roasting, as it allows for better airflow and prevents the meat from sticking to the pan. If a roasting rack isn’t available, you can create a makeshift one using chopped vegetables like carrots, celery, and onions as a base. Ensure the vegetables are sturdy enough to support the weight of the roaster.
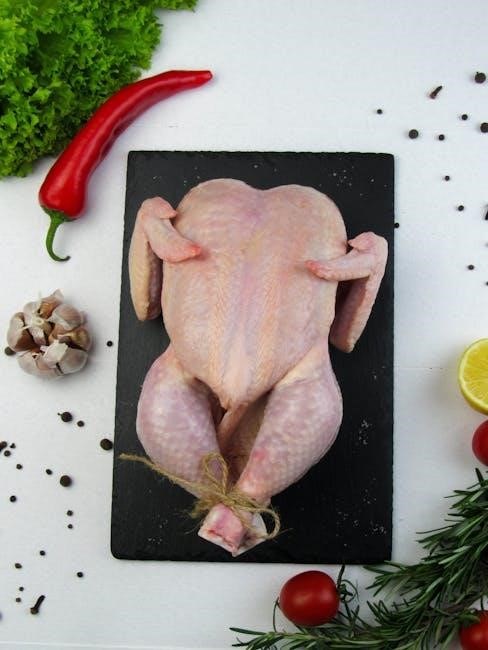
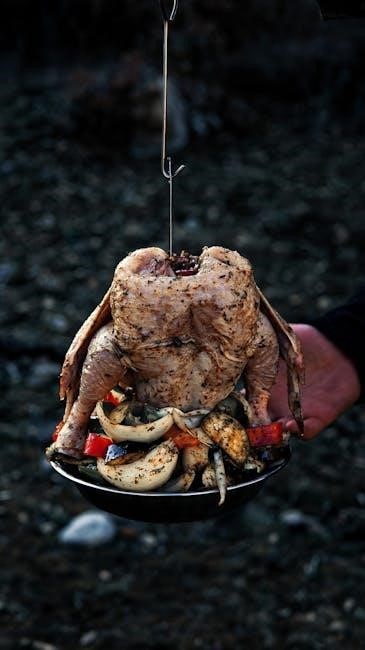
Spatchcocking (Butterflying) the Roaster
Spatchcocking, or butterflying, a Perdue Whole Roaster involves removing the backbone, allowing the bird to lay flat. This technique dramatically reduces cooking time and ensures even cooking throughout, as all parts are roughly the same distance from the heat source. It also maximizes skin exposure, leading to exceptionally crispy skin.
While it may seem daunting, spatchcocking is achievable with kitchen shears or a sharp knife. The flattened profile also makes it easier to season the roaster thoroughly and allows for more creative flavor combinations. Consider this method for a faster, more evenly cooked, and beautifully browned Perdue Whole Roaster.
Benefits of Spatchcocking
Spatchcocking a Perdue Whole Roaster unlocks several culinary advantages. Primarily, it significantly reduces cooking time – often by 25-30% – compared to traditional roasting methods. This faster cook time translates to a more succulent and juicy bird, minimizing the risk of drying out the breast meat.
Furthermore, flattening the roaster promotes incredibly even cooking, eliminating the common issue of overcooked legs and undercooked thighs. The increased surface area also results in beautifully crispy, golden-brown skin all over. Spatchcocking simplifies carving and allows for more effective seasoning penetration, enhancing the overall flavor profile of your Perdue Whole Roaster.
Instructions for Spatchcocking
Begin by placing the Perdue Whole Roaster breast-side down on a sturdy cutting board. Using sharp kitchen shears, cut along both sides of the backbone, removing it completely. Next, flip the roaster over, breast-side up. Firmly press down on the breastbone to flatten the bird. You may hear a crack – this is normal!
Ensure the roaster lies as flat as possible for even cooking. You can gently break the wishbone to further aid flattening. Pat the roaster dry with paper towels. Now it’s ready for seasoning or marinating! Spatchcocking requires a bit of effort, but the resulting faster cooking and even browning are well worth it.
Temperature Monitoring & Safety
Accurate temperature monitoring is crucial for safely cooking a Perdue Whole Roaster, guaranteeing it reaches a safe internal temperature and preventing foodborne illness.
Using a Meat Thermometer
Employing a meat thermometer is the most reliable method to ensure your Perdue Whole Roaster achieves a safe and flavorful outcome. Insert the thermometer into the thickest part of the thigh, avoiding the bone, for an accurate reading. Digital thermometers provide quick and precise results, while instant-read models are convenient for frequent checks during the final stages of cooking.
Traditional oven-safe thermometers can remain in the roaster throughout the cooking process, offering continuous monitoring. Regularly check the temperature, especially during the last hour, to prevent overcooking. Remember to calibrate your thermometer periodically to maintain accuracy. Consistent temperature checks are vital for food safety and achieving perfectly cooked poultry, delivering a moist and tender roaster every time.
Safe Internal Temperature
The United States Department of Agriculture (USDA) recommends cooking poultry to a minimum internal temperature of 165°F (74°C) to ensure it’s safe for consumption. This temperature guarantees the destruction of harmful bacteria like Salmonella. Check the temperature in multiple spots – the thickest part of the thigh and the wing joint – to confirm even cooking throughout the Perdue Whole Roaster.
Don’t rely solely on cooking time; a meat thermometer is crucial. Once the 165°F threshold is reached, remove the roaster from the oven. Allowing the roaster to rest (covered) for the recommended time will allow carryover cooking to finish the process, resulting in a juicier, more tender bird. Prioritizing this safe internal temperature is paramount for a healthy and enjoyable meal.
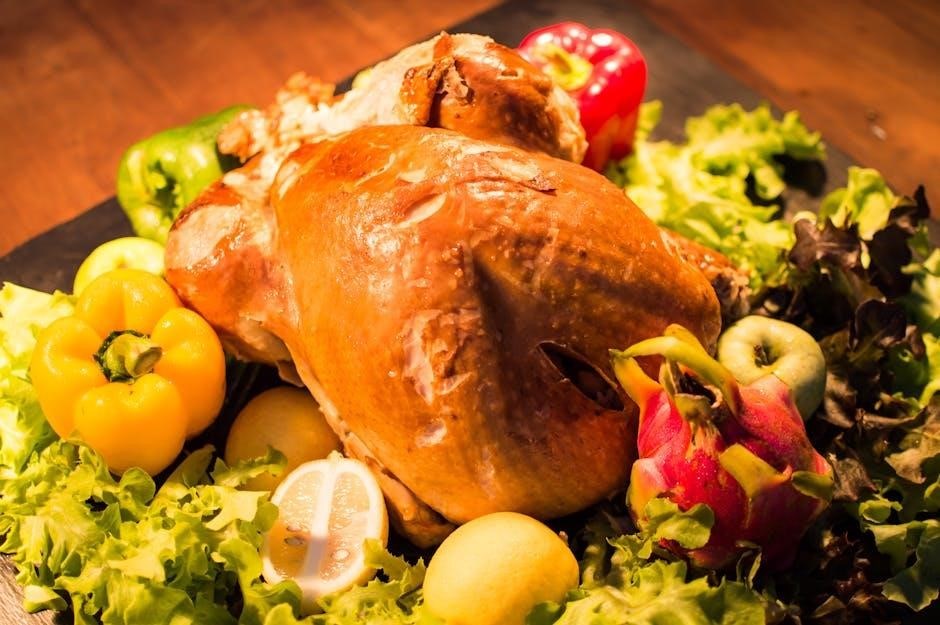
Finishing Touches & Serving
After roasting, allow the Perdue Whole Roaster to rest, enhancing juiciness. Carve skillfully and enjoy with flavorful gravy made from the delicious pan drippings!
Resting the Roaster
Resting the Perdue Whole Roaster is a crucial step often overlooked, yet profoundly impactful on the final result. After removing the roaster from the oven, resist the immediate urge to carve! Cover it loosely with aluminum foil and allow it to rest for at least 20-30 minutes, or even longer for larger birds.
This resting period allows the juices, which have been forced towards the center during cooking, to redistribute throughout the meat. If carved immediately, these valuable juices will simply run out, resulting in a drier, less flavorful roaster. Think of it as letting the muscle fibers relax, reabsorbing moisture and becoming incredibly tender.
The internal temperature will also continue to rise slightly during resting – a phenomenon known as carryover cooking – ensuring it reaches a safe and optimal temperature. Patience during this phase truly elevates the dining experience!
Carving the Perdue Whole Roaster
Once the roaster has rested sufficiently, it’s time to carve! Begin by removing the legs and thighs; these are often the most flavorful parts. Gently pull the leg away from the body and use a sharp carving knife to separate the joint. Repeat for the other leg. Next, carve the breast meat, slicing downwards along the breastbone, keeping the knife parallel to the bone for even slices.
For easier carving, you can remove the wings first. Then, carefully slice the breast meat, working from one end to the other. Aim for slices approximately ¼ to ½ inch thick. Remember to angle your knife slightly to create attractive, uniform portions.
Arrange the carved meat on a platter and enjoy the fruits of your labor!
Making Gravy from Pan Drippings
Don’t discard those flavorful pan drippings! They are the foundation for a rich and delicious gravy. After removing the roaster, pour the drippings into a fat separator or carefully skim off the excess fat. In the roasting pan, whisk in 2-3 tablespoons of flour to create a roux, cooking over medium heat for a few minutes to eliminate the raw flour taste.
Gradually whisk in 2-3 cups of chicken broth, ensuring no lumps form. Bring to a simmer, stirring constantly, until the gravy thickens to your desired consistency. Season with salt, pepper, and any desired herbs like thyme or rosemary. A splash of wine can also enhance the flavor.
Strain the gravy for an extra smooth texture and serve immediately!
Troubleshooting Common Issues
Encountering problems? A dry roaster is often due to overcooking or insufficient basting. Reduce cooking time or baste more frequently with pan juices or melted butter. For uneven cooking, ensure your oven temperature is accurate using an oven thermometer. Rotating the roaster halfway through cooking can also promote even browning.
If the skin isn’t crisping, increase the oven temperature during the last 15-20 minutes. A pale roaster might need longer cooking or a higher temperature. Always verify internal temperature with a meat thermometer to ensure safety. Remember, carryover cooking will continue to raise the temperature slightly after removal from the oven.
Dry Roaster Solutions
A common concern is a dry Perdue Whole Roaster. Several solutions exist! First, ensure you haven’t overcooked it – use a meat thermometer to monitor internal temperature closely. Basting frequently, every 30-45 minutes, with pan drippings, melted butter, or even chicken broth, adds moisture. Consider brining the roaster beforehand; this helps retain moisture during cooking.
If dryness occurs despite these efforts, create a pan sauce using the drippings. Adding wine, stock, or herbs to the pan after removing the roaster can create a flavorful sauce to serve alongside. Covering the roaster loosely with foil for part of the cooking time can also help prevent excessive moisture loss.
Uneven Cooking Prevention
Preventing uneven cooking with a Perdue Whole Roaster requires attention to detail. Using a roasting rack elevates the bird, allowing hot air to circulate fully for even heat distribution. Spatchcocking (butterflying) is highly effective, flattening the roaster for consistent cooking. Rotate the roaster halfway through the cooking process to ensure all sides are exposed to the oven’s heat.
Ensure your oven temperature is accurate; an oven thermometer is a worthwhile investment. Avoid overcrowding the oven with other dishes, as this can impede airflow. If the legs and wings begin to brown too quickly, cover them loosely with foil. Consistent monitoring and these techniques will yield a perfectly cooked roaster.
Storage of Leftovers
Properly storing leftover Perdue Whole Roaster meat is crucial for food safety and maintaining quality. Cool the cooked roaster and any accompanying gravy to room temperature within two hours. Then, divide the meat into smaller, airtight containers for quicker cooling and portion control. Refrigerate promptly; cooked poultry is safely stored in the refrigerator for 3-4 days.
For longer storage, freeze leftover roaster meat. Wrap tightly in freezer-safe plastic wrap, then place in a freezer bag, removing as much air as possible. Frozen roaster can maintain quality for 2-3 months. Always reheat leftovers thoroughly to an internal temperature of 165°F (74°C).