
Singer sewing machines, since 1851, have revolutionized sewing with innovative designs, durability, and versatility․ From heavy-duty to computerized models, Singer offers machines for all skill levels, ensuring quality, reliability, and creativity in every stitch, backed by a legacy of over 170 years․
Safety Precautions and Guidelines
Always read instructions before use․ Unplug when not in use, avoid damaged machines, and keep fingers away from moving parts for safe operation․
2․1․ General Safety Guidelines
Ensure safety while operating your Singer sewing machine by following essential guidelines․ Always unplug the machine when not in use and avoid using it if damaged․ Keep fingers and loose clothing away from moving parts to prevent accidents․ Maintain a clean and stable work area, and never leave the machine unattended while it is operational․ Proper lighting is crucial for visibility, and avoid sewing when fatigued․ Keep children away from the machine, and store accessories safely․ Regularly inspect the machine for wear and tear, and follow the manufacturer’s recommendations for maintenance․ By adhering to these guidelines, you can enjoy a safe and efficient sewing experience․
2․2․ Electrical Safety Tips
To ensure electrical safety while using your Singer sewing machine, always unplug it when not in use or during maintenance․ Avoid overloading power outlets and use the correct power source as specified in the manual․ Keep the machine away from water and moisture to prevent electrical hazards․ Never touch electrical components with wet hands, and avoid using damaged cords or plugs․ Regularly inspect the power cord for signs of wear or damage and replace it if necessary․ Ensure proper ventilation around the machine to prevent overheating․ By following these electrical safety tips, you can minimize risks and ensure a safe sewing environment․
Understanding Your Singer Sewing Machine Model
Identify your Singer sewing machine model by locating the model number on the machine or in the manual․ This helps in accessing the right features, settings, and troubleshooting guides specific to your device, ensuring optimal performance and personalized use․
3․1․ Identifying Your Model Number
To identify your Singer sewing machine model number, check the base, back, or bottom of the machine․ It is usually engraved or printed on a metal plate․ The model number may also be found in the user manual or on the packaging if the machine is new․ Singer sewing machines often have model numbers starting with letters like “HD” for Heavy-Duty models or “QC” for Quilter models․ Visit Singer’s official website or contact customer support if you cannot locate the model number․ Knowing your model number is essential for accessing the correct user manual, troubleshooting guides, and compatible accessories․ This ensures you can fully utilize your machine’s features and maintain it properly․
3․2․ Accessing Model-Specific User Manuals
To access a model-specific user manual for your Singer sewing machine, visit the official Singer website․ Navigate to the “Support” or “Downloads” section and enter your machine’s model number in the search bar․ Download the PDF version of the manual, which is compatible with most devices․ If you cannot access the website, contact Singer’s customer support for assistance․ Authorized Singer dealers may also provide physical copies of the manual․ Ensure the manual matches your machine’s model for accurate instructions․ This resource will guide you through setup, operation, and maintenance, helping you maximize your sewing experience․ Always refer to the official Singer website for the most reliable and updated manuals․
Types of Singer Sewing Machines
Singer sewing machines come in various types, including mechanical, heavy-duty, computerized, overlockers, and specialized models like embroidery or quilting machines, each catering to different sewing needs and preferences․
4․1․ Heavy-Duty Models
Singer heavy-duty sewing machines are designed for robust sewing tasks, offering exceptional durability and performance․ Built with metal frames and powerful motors, these models are ideal for sewing thick fabrics like denim, canvas, and leather․ They are perfect for heavy-duty projects, such as upholstery, quilting, and industrial-scale sewing․ These machines often feature advanced stitch options, including heavy-duty straight stitches and reinforced reverse stitching․ With their sturdy construction and high-speed operation, Singer heavy-duty models are favored by professionals and serious hobbyists who require reliability and precision for demanding projects․
4․2․ Computerized Models
Singer computerized sewing machines combine modern technology with sewing excellence, offering advanced features for precise and versatile stitching․ These models typically include large LCD touchscreens, USB connectivity for importing custom designs, and a wide range of built-in stitches․ Many computerized Singer machines allow users to adjust stitch length, width, and tension with ease․ They often feature automatic needle threading, thread cutters, and memory storage for custom stitch patterns․ These machines are ideal for both beginners and experienced sewists, providing a seamless experience for quilting, embroidery, and decorative stitching․ Their advanced capabilities make them perfect for those who value innovation and convenience in their sewing projects․
Setting Up Your Singer Sewing Machine
Setting up your Singer sewing machine involves placing it on a stable, clean surface, away from direct sunlight and moisture․ Ensure the power source is compatible and safe before use․
5․1․ Unpacking and Initial Setup
When unpacking your Singer sewing machine, carefully remove it from the box and inspect for any damage or missing parts․ Place the machine on a stable, flat surface, ensuring good lighting and ventilation․ Before plugging in, ensure the power cord is undamaged and compatible with your electrical outlet․ Remove any protective packaging materials, such as plastic coverings, from the machine’s exterior and accessories․ Locate the user manual and accessory kit, which typically includes bobbins, needles, and presser feet․ Familiarize yourself with the machine’s components and controls․ If your model includes additional features, like a sewing table or extension arm, attach them according to the manual’s instructions․ Always read the manual thoroughly before first use to ensure proper setup and operation․
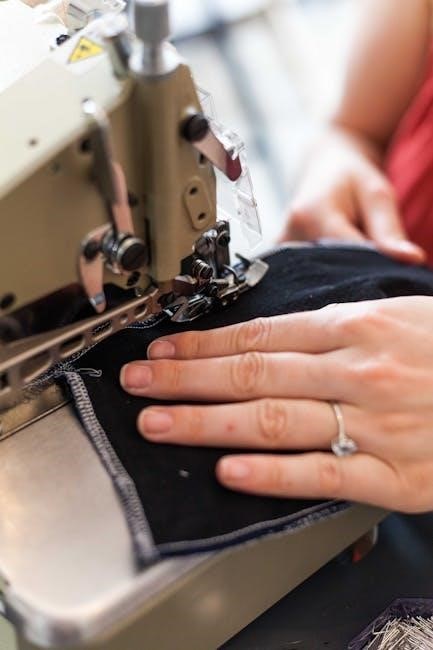
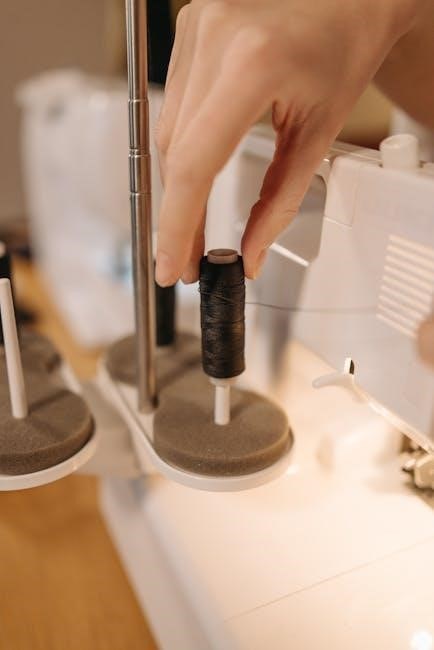
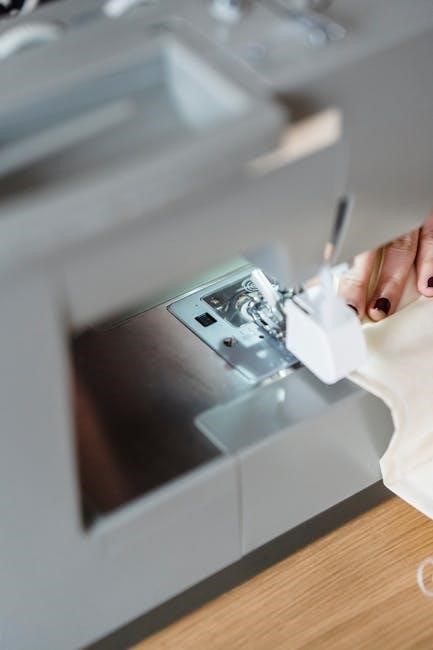
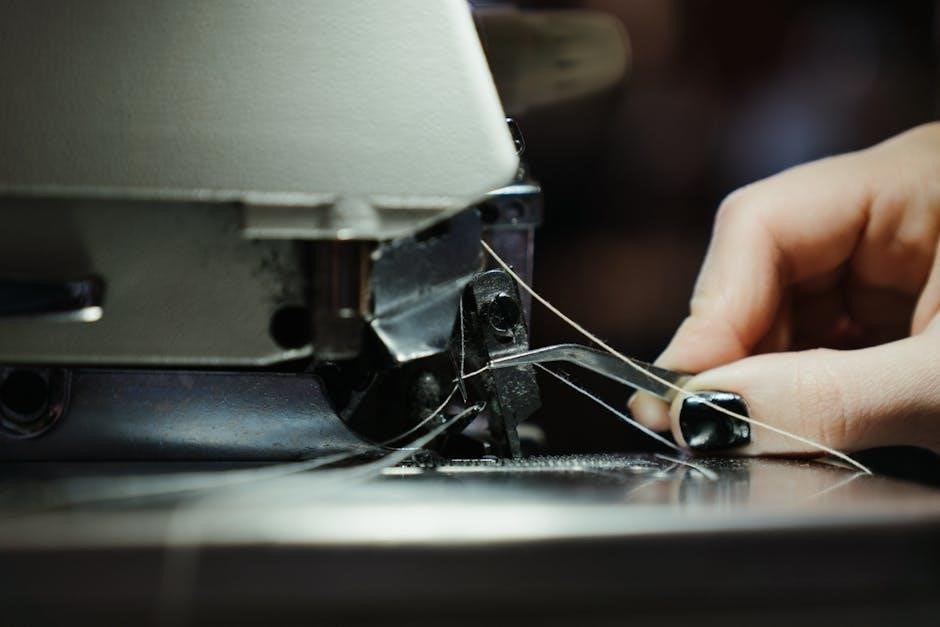
5․2․ Threading the Machine
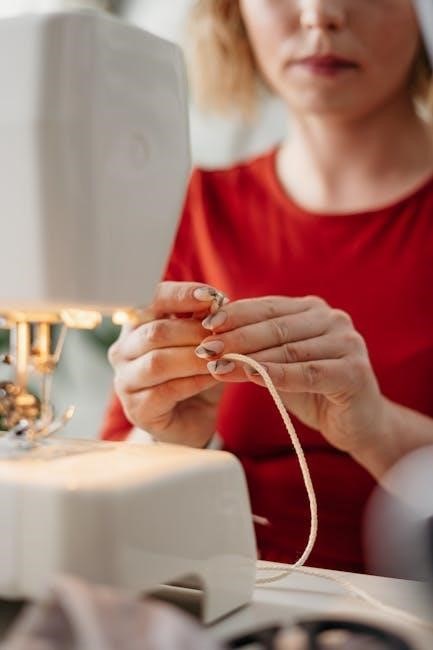
Threading your Singer sewing machine is a straightforward process that ensures smooth stitching․ Begin by turning off and unplugging the machine for safety․ Locate the spool pin and gently pull the thread end through the tension discs, guiding it through the machine’s thread path․ Pass the thread through the take-up lever and then through the needle’s eye from front to back․ Leave a small tail of thread below the needle․ Cut the thread close to the spool to avoid tangles․ Finally, gently pull the thread to ensure it is seated properly and test the tension by pulling lightly․ Proper threading is essential for consistent stitches and machine performance․
5․3․ Installing the Bobbin
Installing the bobbin in your Singer sewing machine is a crucial step to ensure proper stitching․ Begin by removing the bobbin case from the machine and placing the bobbin inside, making sure the thread is evenly wound and not twisted․ Insert the bobbin into the case, aligning the notch on the bobbin with the spring in the case․ Gently pull the thread to ensure it is seated properly and cut any excess thread above the bobbin․ Replace the bobbin case into the machine, ensuring it clicks into place securely․ Finally, pull the thread gently to ensure it is properly seated and ready for sewing․ Proper bobbin installation ensures consistent stitching and prevents machine issues․

Basic Operations and Functions
Mastering basic operations ensures smooth sewing experiences․ Learn to start projects, select stitches, and use controls like the foot pedal effectively for consistent results every time․
6․1․ Starting Your First Sewing Project
Begin by plugging in your Singer sewing machine and turning it on․ Select a straight stitch for simplicity․ Thread the machine as instructed, ensuring the thread flows smoothly through the tension discs and take-up lever․ Place your fabric under the presser foot, aligning the edge with the machine’s guide․ Gently press the foot pedal to start sewing, maintaining steady fabric movement․ Practice on scrap fabric first to ensure even stitches․ Adjust the stitch length and width if needed for your fabric type․ Always keep the work area clear and your hands away from the needle․ Start slowly and build confidence as you sew evenly and consistently․
6․2․ Selecting the Right Stitch
Selecting the appropriate stitch for your project is crucial for achieving professional results․ Singer sewing machines offer various stitch options, including straight, zigzag, and decorative stitches․ For basic sewing, the straight stitch (1-10) is ideal for straight lines and repairing fabrics․ Zigzag stitches (11-20) are perfect for stretchy fabrics and preventing fraying․ Decorative stitches (21-30) add aesthetic value for embroidery or embellishments․ Use the stitch selection buttons or dial to choose your desired stitch․ Refer to your user manual for specific stitch codes and their uses․ Always test the stitch on scrap fabric before sewing your final project to ensure the best outcome․ Experiment with different settings to find the perfect stitch for your fabric type and project needs․
6․3․ Using the Foot Pedal
The foot pedal is an essential control for operating your Singer sewing machine․ It allows you to regulate the sewing speed effortlessly․ Place the pedal on a flat, stable surface and position your foot comfortably․ Gently press the pedal to start sewing, and release to stop․ For consistent stitching, apply steady, even pressure․ Avoid sudden jerky movements, as they can cause uneven stitching․ You can adjust the pedal’s sensitivity in some models to suit your preference․ Practice using the pedal at a slow pace to maintain control, especially when working on delicate fabrics or intricate designs․ This ensures smooth, precise sewing and helps you achieve professional-looking results․
Advanced Features and Customization
Singer sewing machines offer programmable stitches and customizable settings․ Use the LCD display to edit and save stitch patterns․ Adjust stitch length, width, and speed for precise fabric handling, enhancing creativity and efficiency․
7․1․ Customizing Stitch Settings
Customizing stitch settings on your Singer sewing machine allows you to tailor your sewing experience to specific projects․ Use the LCD display to adjust stitch length, width, and density․ For delicate fabrics, reduce stitch length and density, while heavier fabrics may require longer, tighter stitches․ Many models offer programmable memory, letting you save favorite stitch combinations․ Experiment with decorative stitches, such as floral patterns or geometric designs, to add unique touches․ Adjust the tension settings to ensure proper fabric feeding and thread flow․ Some machines also allow synchronizing stitch patterns with foot pedal control for smoother operation․ Always refer to your user manual for model-specific customization options․
7․2․ Using Special Stitches
Explore the creative possibilities of your Singer sewing machine by utilizing its special stitches․ These stitches, such as satin stitch, stretch stitch, or decorative patterns, are designed for specific sewing tasks․ To access special stitches, navigate through the machine’s menu using the control panel or touchscreen․ Many models allow you to preview the stitch on the LCD screen before sewing․ Adjust the stitch length and width to suit your fabric type․ For embroidery or appliqué, use the one-step buttonhole or mirror stitch functions․ Some machines also feature automatic stitch combinations, saving time for complex projects․ Always test the stitch on scrap fabric first to ensure optimal results․ Refer to your manual for model-specific special stitch options․

Maintenance and Care Tips
Regularly dust your Singer sewing machine to prevent dust buildup․ Cover it when not in use to protect from debris․ Avoid exposure to extreme temperatures or moisture․ Use a soft cloth to wipe surfaces and keep the machine dry․ Check for loose parts periodically and tighten them․ Always unplug the machine before cleaning or performing maintenance․ Store the machine in a cool, dry place to ensure longevity․ Follow these care tips to maintain optimal performance and extend the lifespan of your Singer sewing machine․
8․1․ Cleaning the Machine
Regular cleaning is essential to maintain the performance of your Singer sewing machine․ Always unplug the machine before cleaning to ensure safety․ Use the small brush provided with your machine to gently sweep away dust, lint, and thread fragments from the bobbin area, feed dogs, and other visible crevices․ Avoid using compressed air or harsh chemicals, as they may damage internal components․ For tougher debris, dampen a soft cloth with distilled water and carefully wipe surfaces, but avoid getting moisture inside the machine․ Never touch electrical parts with a wet cloth․ Clean the exterior with a dry, soft cloth to remove fingerprints or smudges․ Regular cleaning prevents lint buildup and ensures smooth operation․
8․2․ Lubricating Moving Parts
Lubricating your Singer sewing machine’s moving parts is crucial for smooth operation and to prevent wear․ Use only Singer Sewing Machine Oil or a high-quality sewing machine lubricant, as specified in your manual․ Turn off and unplug the machine before lubricating․ Locate the oiling points, typically found near the bobbin area, handwheel, or shuttle hook․ Apply a few drops of oil to these areas, then gently turn the handwheel to distribute the oil evenly․ Allow the machine to sit for a few minutes to let the oil penetrate․ Avoid over-lubrication, as excess oil can attract dust and lint․ Regular lubrication ensures optimal performance and extends the machine’s lifespan․
Troubleshooting Common Issues
Common issues include thread breakage, uneven stitching, or machine jamming․ Always check thread tension, bobbin alignment, and power supply․ Refer to the manual for specific solutions․
- Check for loose parts or misaligned components․
- Ensure proper threading and bobbin installation․
- Consult the error code guide if applicable․
Regular maintenance and correct usage prevent most issues․ If problems persist, contact Singer support or an authorized service provider for professional assistance․
9․1; Identifying Common Problems
Common issues with Singer sewing machines include thread bunching, uneven stitching, or the machine not turning on․ These problems often stem from incorrect thread tension, misaligned bobbin, or improper fabric handling․
- Thread breakage: Check for loose threads or incorrect tension settings․
- Machine noise: Ensure all parts are securely tightened and well-lubricated․
- Fabric not moving: Verify the presser foot is lowered and the feed dogs are functioning․
Identifying the root cause quickly helps resolve issues effectively․ Always refer to the user manual for model-specific troubleshooting guidance or contact Singer support for assistance․
9․2․ Understanding Error Codes
Modern Singer sewing machines often display error codes to indicate specific issues․ These codes, like E1, E2, or E3, help diagnose problems quickly․ Common errors include thread jams, bobbin issues, or sensor malfunctions․ Refer to your model’s user manual for exact code meanings, as they vary by machine․ For example, an E1 might indicate a jammed needle, while an E3 could signal a bobbin error․ Resetting the machine or clearing the jam usually resolves these issues․ If codes persist, consult the troubleshooting section or contact Singer support for assistance․ Understanding these codes ensures efficient problem-solving and keeps your machine running smoothly․ Always follow manual guidelines for resets or repairs․

Upgrading and Updating Your Machine
Upgrading and updating your Singer sewing machine ensures optimal performance and access to new features․ Regular software updates are released to enhance functionality and fix issues․ Check the Singer official website for the latest updates compatible with your model․ Follow the step-by-step guide provided with the update to install it correctly․ Some machines allow updates via USB or direct computer connection․ Always use Singer-approved update tools to avoid damaging your machine․ Additionally, hardware upgrades, such as new presser feet or specialized accessories, can expand your machine’s capabilities․ Consult your user manual or contact Singer support for guidance on compatible upgrades․ Regular updates ensure your machine stays efficient and innovative․ Always prioritize authorized updates to maintain warranty and performance․ Upgrading is a great way to refresh your sewing experience․ Keep your Singer sewing machine up-to-date for the best results․
Accessories and Compatible Products
Enhance your sewing experience with Singer-approved accessories and compatible products․ Essential accessories include various presser feet, such as zigzag, zipper, and buttonhole feet, designed for specific tasks․ Bobbins, needles, and thread sets are also crucial for optimal performance․ Singer offers a range of optional attachments, like quilting tables and extension trays, to expand your machine’s functionality․ Always use Singer-recommended products to ensure compatibility and avoid damage․ Visit Singer’s official website or authorized retailers to explore the full range of accessories tailored to your machine․ These products are designed to enhance precision, versatility, and creativity․ Invest in genuine Singer accessories to maintain quality and expand your sewing possibilities․ Accessories are a great way to customize your machine for specific projects․ Always choose Singer-compatible products for the best results․
Operating Tips for Different Fabrics
When working with various fabrics, adjust your Singer sewing machine settings to ensure optimal results․ For delicate fabrics like silk or chiffon, use a sharp needle and a shorter stitch length to prevent tearing․ Heavy-duty fabrics, such as denim or canvas, require a heavier needle and a longer stitch length for strength․ Knit fabrics may need a stretch stitch or a zigzag stitch to allow flexibility․ Always test stitches on scrap fabric before sewing your final project․ Use the appropriate presser foot for the fabric type, such as a walking foot for thick layers or a Teflon foot for slippery fabrics․ Adjusting tension and stitch settings can help achieve professional-looking results․ Proper fabric handling ensures smooth sewing and prevents damage to your machine․
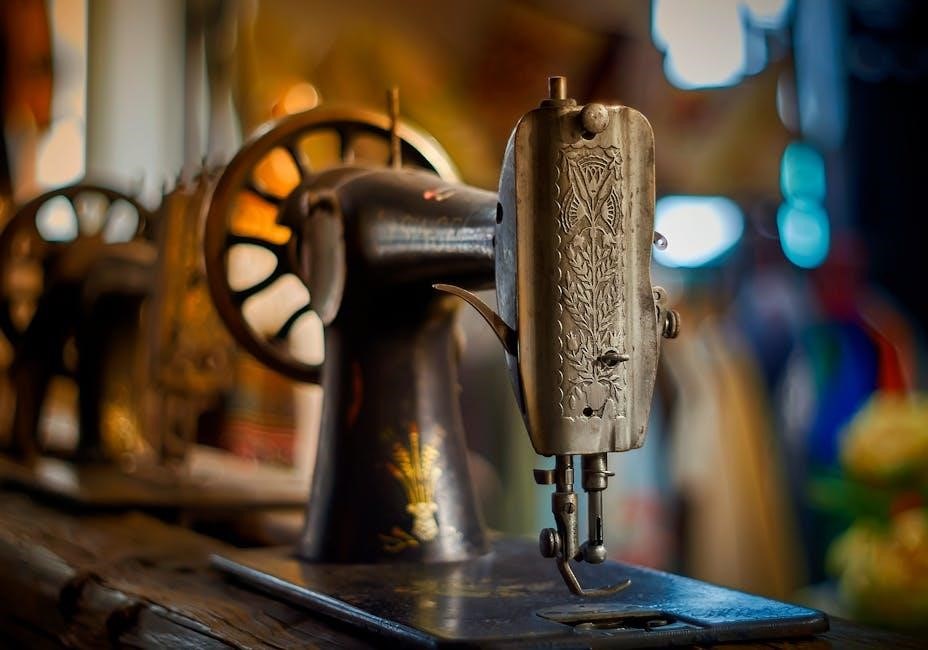
Singer’s History and Innovation
Singer Sewing Company, founded in 1851 by Isaac Singer, revolutionized sewing with its groundbreaking innovations․ The first practical sewing machine, patented by Singer, made sewing accessible to households and industries worldwide․ Over the years, Singer introduced pioneering advancements, such as the first portable electric sewing machine in the 1920s and the first computerized sewing machine in the 1970s․ Known for durability and user-friendly designs, Singer machines have remained a trusted choice for sewists globally․ The company’s commitment to innovation and quality has cemented its legacy as a leader in the sewing industry, continuously adapting to meet the evolving needs of sewers․ Singer’s history is a testament to its dedication to excellence and creativity․