
Sure-Jell Freezer Jam Instructions
Making freezer jam with Sure-Jell is a simple and rewarding process․ This method allows you to enjoy fresh, homemade jam without the need for canning․ With just a few steps, you can have delicious jam ready to spread on toast, add to your favorite desserts, or even enjoy on its own․
This guide will walk you through the steps involved in making Sure-Jell freezer jam, from preparing the fruit to storing the finished product․
Introduction
Freezer jam is a delightful way to capture the essence of summer’s bounty and enjoy it throughout the year․ Unlike traditional cooked jams, freezer jam requires no canning or lengthy cooking times, making it a quick and convenient option for busy cooks․ Sure-Jell, a popular brand of pectin, simplifies the process even further, ensuring a smooth and set texture․ The key to successful freezer jam lies in using the right amount of pectin, which helps the jam thicken without the need for heat․ This method also retains the vibrant color and fresh flavor of the fruit․ Whether you have a surplus of strawberries, raspberries, or other seasonal fruits, Sure-Jell freezer jam offers a simple and delicious way to preserve nature’s sweetness․ With just a few ingredients and a little time, you can create a batch of homemade jam that’s perfect for spreading on toast, topping ice cream, or enjoying in countless other ways․
Ingredients
The beauty of freezer jam lies in its simplicity․ You’ll need just a few essential ingredients to create a delicious and satisfying spread․ Here’s a typical breakdown for a basic Sure-Jell freezer jam recipe⁚
- Fresh Fruit⁚ The star of the show! Choose your favorite fruits like strawberries, raspberries, blueberries, or even a mix for a unique flavor․ Freshness is key, so select fruits that are ripe and free from blemishes․
- Sugar⁚ Sugar not only adds sweetness but also helps to preserve the jam and create a smooth texture․ Granulated sugar is the most common choice for freezer jam․
- Sure-Jell Pectin⁚ This is the magic ingredient that ensures the jam sets properly․ Sure-Jell pectin is specifically designed for freezer jam and helps the jam thicken without the need for boiling․
- Water⁚ A small amount of water is needed to activate the pectin and create a smooth consistency․
The exact quantities of each ingredient will vary depending on the type of fruit you’re using and the specific recipe you follow․ Always refer to the instructions on the Sure-Jell pectin package for precise measurements and guidance․
Equipment
You don’t need a lot of fancy equipment to make delicious freezer jam․ A few simple tools from your kitchen will suffice․ Here’s a list of essential equipment to get you started⁚
- Large Bowl⁚ A spacious bowl is needed for combining the fruit, sugar, and pectin mixture․ Choose a bowl large enough to accommodate the volume of your recipe․
- Small Saucepan⁚ This is used for preparing the pectin mixture․ A small saucepan is sufficient for heating the water and pectin to a boil․
- Measuring Cups and Spoons⁚ Accurate measurements are crucial for successful jam-making․ Use standard measuring cups and spoons for precise quantities of ingredients․
- Potato Masher or Food Processor⁚ You’ll need to crush the fruit to release its juices and create a smooth texture․ A potato masher works well for smaller batches, while a food processor is ideal for larger quantities․
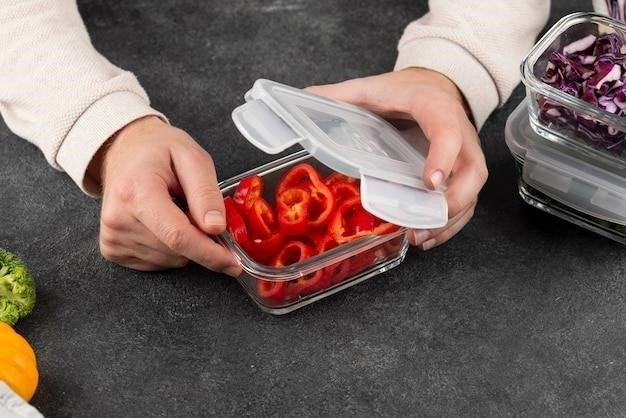
- Freezer-Safe Containers⁚ You’ll need airtight containers to store the finished jam․ Choose containers with lids that seal tightly to prevent freezer burn and maintain freshness․
- Wooden Spoon or Spatula⁚ A sturdy spoon or spatula is needed for stirring the jam mixture and ensuring thorough blending․
Optional equipment, such as a funnel, can make filling the containers easier, but is not essential․ With these basic tools, you’re ready to embark on your freezer jam adventure!
Preparing the Fruit
The quality of your fruit will directly impact the flavor and texture of your freezer jam․ Start with fresh, ripe fruit for the best results․ Here’s a step-by-step guide to preparing your fruit⁚
- Wash and Clean⁚ Thoroughly wash the fruit under cold running water, removing any debris or dirt․ For berries, gently remove stems and leaves․ For other fruits, such as peaches or plums, you may need to pit or core them before proceeding․
- Crush or Chop⁚ Using a potato masher, food processor, or blender, crush or chop the fruit to release its juices․ The desired consistency varies depending on personal preference, but aim for a mixture that’s mostly crushed with some small pieces of fruit remaining․
- Measure Accurately⁚ Once the fruit is crushed, measure out the exact amount required for your recipe․ Use a dry measuring cup to ensure accurate measurements․
- Optional⁚ Pre-Cook or Freeze⁚ For some fruits, pre-cooking or freezing can help release additional juices and ensure a smoother texture․ This is especially helpful for fruits that tend to be firm, such as apples or pears․ If you’re using frozen fruit, thaw it completely before proceeding․
Properly prepared fruit is essential for achieving a delicious and visually appealing freezer jam․ Take the time to carefully follow these steps, and you’ll be rewarded with a flavorful and satisfying homemade treat․
Preparing the Pectin Mixture
The pectin mixture is the key ingredient that helps your freezer jam set properly․ Sure-Jell pectin is specifically designed for freezer jams, ensuring a good consistency without the need for lengthy cooking times․ Here’s how to prepare the pectin mixture⁚
- Measure Accurately⁚ Use a dry measuring cup to ensure accurate measurements; Measure the exact amount of Sure-Jell pectin required for your recipe․
- Combine with Cold Water⁚ In a small saucepan, slowly stir the measured pectin into a specified amount of cold water․ The exact amount of water will vary depending on the recipe, so carefully follow the instructions on your pectin package․
- Bring to a Boil⁚ Place the saucepan on medium heat and bring the pectin mixture to a full boil, stirring constantly․ This process helps activate the pectin, ensuring a good set for your jam․
- Boil for Two Minutes⁚ Once the mixture reaches a full boil, continue to stir constantly and boil for exactly two minutes․ This ensures the pectin is properly activated, leading to a consistent texture in your jam․
- Remove from Heat⁚ After boiling for two minutes, immediately remove the saucepan from the heat․ The pectin mixture is now ready to be combined with your prepared fruit․
By following these steps, you’ll create a properly activated pectin mixture that will ensure your freezer jam sets correctly, resulting in a smooth and delicious spread․
Combining the Fruit and Pectin Mixture
Once your fruit is prepared and the pectin mixture is ready, it’s time to combine them․ This step is crucial for achieving a properly set jam with a delicious flavor․ Here’s how to combine the fruit and pectin mixture⁚
- Add Fruit to a Bowl⁚ Pour the prepared fruit, whether it’s crushed strawberries, raspberries, or another fruit of your choice, into a large bowl․
- Stir in Sugar⁚ Carefully measure and add the specified amount of sugar to the bowl containing the fruit․ The sugar content is essential for preserving the jam and adding sweetness․
- Stir Thoroughly⁚ Gently stir the fruit and sugar mixture until the sugar is evenly distributed throughout the fruit․ This ensures a balanced flavor and helps the sugar dissolve properly during the setting process․
- Pour in Pectin Mixture⁚ Carefully pour the hot pectin mixture into the bowl with the fruit and sugar․ Be sure to pour it slowly and stir continuously to prevent the pectin from clumping together․
- Stir Until Combined⁚ Continue stirring the mixture until the pectin is fully incorporated into the fruit and sugar․ This ensures a consistent texture and helps the pectin work its magic in setting the jam․
After combining the fruit and pectin mixture, the next step is to fill your containers and allow the jam to set․ You’ll be one step closer to enjoying a homemade freezer jam that’s perfect for spreading on toast, topping ice cream, or adding to your favorite desserts․
Filling and Storing the Jam
Once the fruit and pectin mixture are combined and have had time to sit, it’s time to fill your containers and store the jam․ This step is critical for preserving the freshness and quality of your homemade freezer jam․ Here’s how to fill and store your jam⁚
- Prepare Containers⁚ Rinse clean plastic containers and lids with boiling water․ This helps sanitize the containers and prevent the growth of bacteria in the jam․ Dry the containers thoroughly before filling them․
- Fill Containers⁚ Carefully pour the jam mixture into the prepared containers, leaving about ½ inch of space at the top․ This allows for expansion as the jam sets and prevents spills or overflows․
- Wipe Container Edges⁚ Wipe the top edges of the containers with a clean, damp cloth․ This helps remove any excess jam that might be clinging to the edges, which can interfere with proper sealing․
- Seal Containers⁚ Immediately cover the containers with their lids, ensuring a tight seal․ This prevents air from entering and helps keep the jam fresh․
- Let Stand at Room Temperature⁚ Allow the jam to stand at room temperature for 24 hours․ This allows the pectin to fully set and the jam to solidify properly․
- Refrigerate or Freeze⁚ After the 24-hour setting time, you can store the jam in the refrigerator for up to 3 weeks or freeze it for up to 1 year․ If you freeze the jam, thaw it in the refrigerator before using it․
Following these steps for filling and storing your freezer jam will ensure that you have a delicious and safe product that you can enjoy for weeks or even months to come․
Tips for Success
While making freezer jam with Sure-Jell is a straightforward process, there are a few tips that can help ensure a successful and delicious outcome․ Following these tips can help you create a jam that sets properly, has a vibrant flavor, and lasts longer․
- Use Fresh Fruit⁚ Fresh fruit provides the best flavor and texture for freezer jam․ If using frozen fruit, make sure to thaw and drain it thoroughly before using it in the recipe․ This helps prevent the jam from being too watery․
- Measure Accurately⁚ Accurate measuring is crucial for freezer jam․ Use a kitchen scale or dry measuring cups to ensure that you have the correct amount of fruit, sugar, and pectin․
- Don’t Overcook the Pectin Mixture⁚ Boiling the pectin mixture for too long can cause it to lose its gelling power․ Stick to the recommended boiling time, which is usually 2 minutes․
- Stir Constantly⁚ Stirring the pectin mixture constantly during the boiling process helps prevent it from sticking to the bottom of the pan and burning․
- Cleanliness Is Key⁚ Make sure all of your equipment, including the jars, lids, and utensils, are clean and sanitized․ This helps prevent the growth of bacteria in the jam․
By following these tips, you can increase your chances of making a successful batch of freezer jam that will be a delicious treat for you and your family․
Troubleshooting
Even with careful preparation and adherence to the instructions, sometimes things don’t go exactly as planned․ If you encounter problems with your Sure-Jell freezer jam, don’t despair! There are a few common issues and solutions to help you troubleshoot and get back on track․
- Jam Not Setting⁚ If your jam doesn’t set properly, there are a few possible culprits․ Firstly, ensure you used the correct amount of Sure-Jell pectin and that it wasn’t expired․ Secondly, make sure you followed the boiling instructions for the pectin mixture, as overcooking can affect its gelling power․ Lastly, ensure you measured the fruit accurately, as too much liquid can dilute the pectin’s effectiveness․
- Jam Too Thin⁚ If your jam is too thin, you might have added too much liquid or not allowed it to set long enough․ Refrigerate the jam for an additional 24 hours to allow it to fully set․ If it’s still too thin, you can try adding a little more pectin․
- Jam Too Thick⁚ If the jam is too thick, you might have added too much pectin or not enough liquid․ You can try adding a little more liquid to thin it out․ If the jam is already fully set, it’s best to simply enjoy it as is․
If you’re still having trouble with your freezer jam, consult the instructions on the Sure-Jell package for additional troubleshooting tips․ Remember, practice makes perfect, and with a little patience and experimentation, you’ll be able to create delicious and successful freezer jam every time․
Uses for Freezer Jam
Freezer jam made with Sure-Jell is a versatile and delicious treat that can be enjoyed in countless ways․ Beyond the classic spread on toast, your homemade jam can add a touch of sweetness and flavor to a wide array of culinary creations․
- Breakfast Delights⁚ Start your day with a delightful dollop of freezer jam on pancakes, waffles, or biscuits․ The sweet and fruity flavor will make your breakfast even more enjoyable․
- Dessert Enhancements⁚ Elevate your desserts with a layer of freezer jam․ It’s perfect for topping ice cream, yogurt, and even cheesecake for a burst of fresh flavor․
- Baking Inspiration⁚ Add a touch of homemade sweetness to your baked goods․ Use freezer jam as a filling for cookies, muffins, and even cakes․ It will add a unique and delicious flavor to your creations․
- Creative Cocktails⁚ Mix up your favorite cocktails with a splash of freezer jam․ It adds a sweet and fruity twist to classic drinks like margaritas and mojitos․
- Savory Surprises⁚ Don’t be afraid to experiment with savory uses for freezer jam․ Add a dollop to grilled cheese sandwiches, use it as a glaze for grilled chicken or pork, or even incorporate it into a savory sauce․
Let your imagination run wild and discover the many ways you can use your homemade freezer jam to enhance your culinary creations․